Thursday, 31 October 2019

How to get Paging Cookie while retrieving data using Fetch XML Query in Microsoft Flow

Introduction

Microsoft Flow is bringing new connectors day by day to ease the life of its users.
With the new connector for Common Data Service, while performing the List Records action, now we have the provision to use Select QueryFetch XML Query and Skip token, rest of the other things remaining the same.
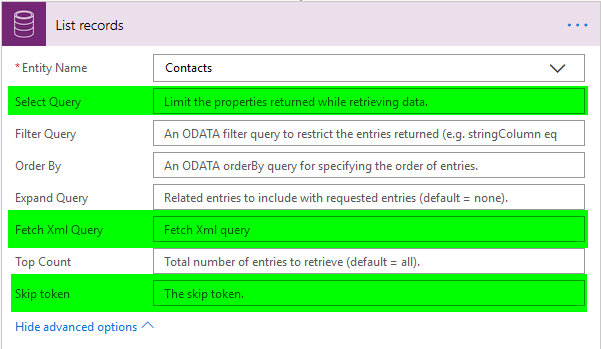
Microsoft Flow
Today, we’ll see how we can use Fetch Xml Query and then get the paging cooking to re-use it for next retrieve request.
Consider a scenario where I have an on demand flow which is called by passing the paging cookie, page number and count as parameters.
Based on the parameters passed, the retrieval takes place and also the necessary actions are performed on the retrieved records. After the retrieval, if there are more records, then the flow returns back the paging cookie for next retrieval.
Let’s take a look at how to design a Microsoft Flow for this request.
Step 1:
Select an HTTP Request Trigger.
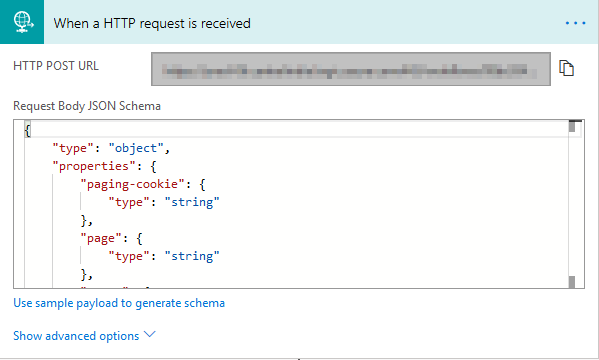
Microsoft Flow
Given below is the JSON Schema as per the requirement.
{

"type": "object",

"properties": {

"paging-cookie": {

"type": "string"

},

"page": {

"type": "string"

},

"count": {

"type": "string"

}

}

}
Step 2:
Initialize the paging cookie. This is the paging cookie sent as a parameter in the http request.
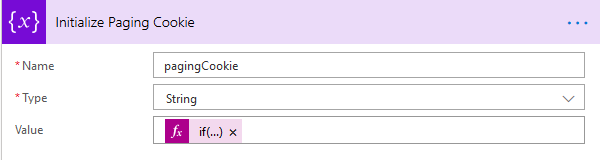
Microsoft Flow
Value expression,
if(empty(triggerBody()?[‘paging-cookie’]),”,concat(‘paging-cookie=”’,triggerBody()?[‘paging-cookie’],””))
Note: The above Value expression makes sure that we handle the empty paging cookie scenario as well.
Step 3:
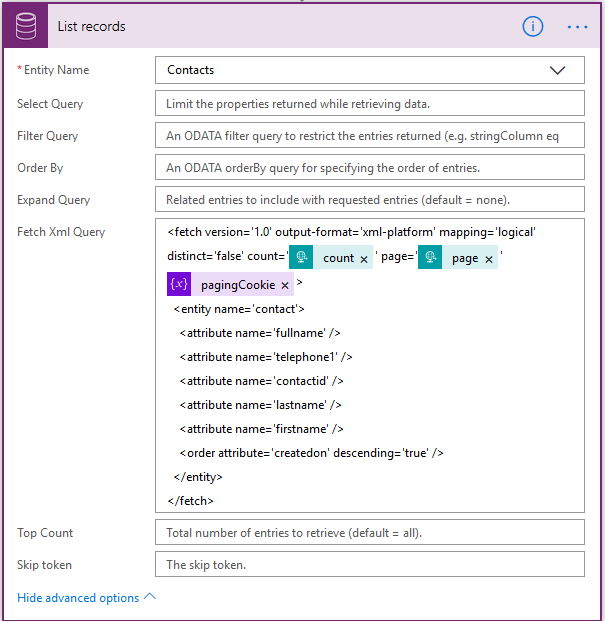
Retrieve the records using Fetch XML.
Microsoft Flow
Here,
count – It is sent over as a parameter in the http request.
page – It is sent over as a parameter in the http request.
pagingCookie – This is the variable initialized in Step 2.
Step 4:
Perform necessary actions on the records retrieved in Step 3.

Microsoft Flow
Step 5:
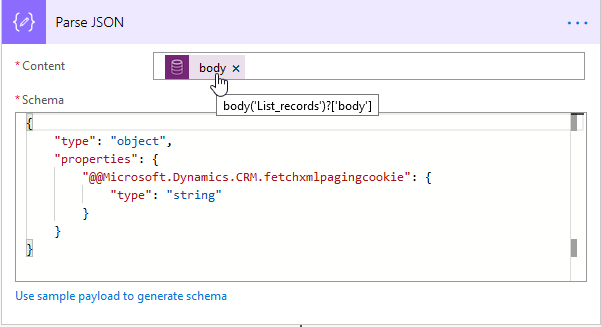
Parse the JSON of the response from Step 3. This helps us get the paging cookie.
Microsoft Flow
For copying purpose, I am pasting here the JSON.
{

"type": "object",

"properties": {

"@@Microsoft.Dynamics.CRM.fetchxmlpagingcookie": {

"type": "string"

}

}

}
Step 6:
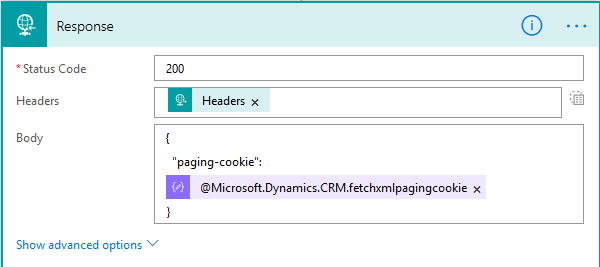
Return back the paging cookie to where the request was originated.
Microsoft Flow
The dynamic parameter used in the above bod is a by-product of Step 5.
Note:
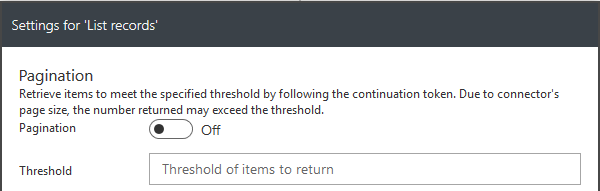
Out of the box Pagination brings the data in the multiple of 512, so if you have specific pagination needs, then using paging cookie makes more sense.
Microsoft Flow
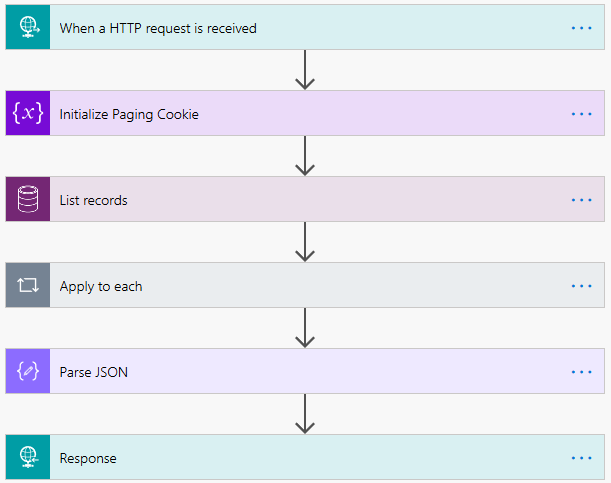
Flow in its entirety:
Microsoft Flow


Tuesday, 6 March 2018

Configure Dynamics 365 and Azure Service Bus Integration (using OneWay relay and listener)

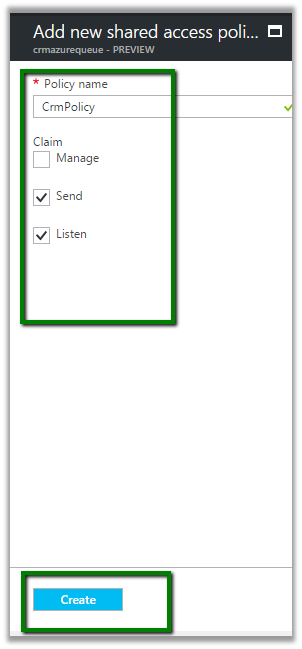
Here we’d add a new Shared Access Policy in the Azure Service Bus.
We can copy the connection string
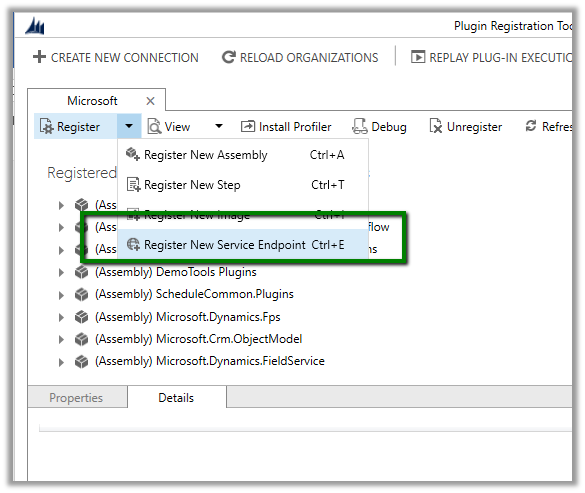
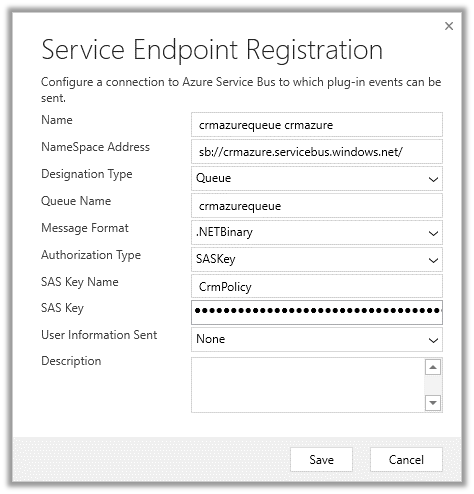
Paste it in Service Endpoint registration dialog box of Plugin Registration tool
Change the designation type to OneWay, use https for the namespace address.
Register a step for creation of lead
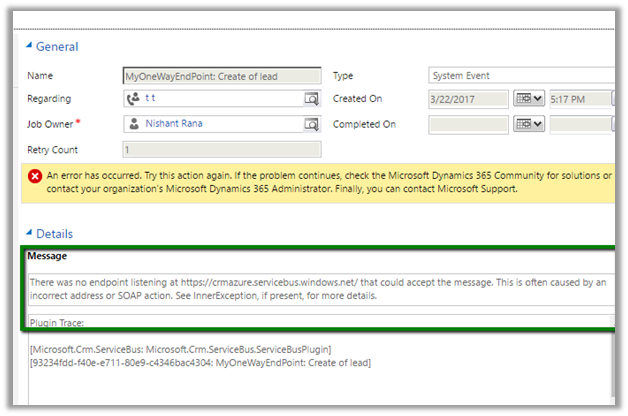
Now we go and create a lead record, which triggers our plugin and creates a system job for it.
The system job fails as we do not have any active listener at the end point.
Now let us create a simple windows application which will act as listener.
Basically, we need to implement IServiceEndPointPlugin Interface, create a Service Host, define a new transportclientendpointbehaviour with shared access signature token provider, use WS2007HttpRelayBinding in our service end point.
Now run the listener application, and create a lead record in CRM.
We can see the break point hit in our listener application’ Execute method. Execute method is invoked whenever a message is posted to the service bus by Microsoft Dynamics 365.
System Job also shows the status as succeeded as we had our listener registered to the endpoint and running.

Configure Dynamics 365 and Azure Service Bus Integration (through Queue and QueueClient)

Let us configure Dynamics 365 and Azure Service Bus integration.
Here we would implement a basic scenario, every time a lead is created in CRM we’d pass this execution context information to the queue. The app then reads and shows the information.
As a first step, we need to register a service end point through plugin registration tool.
Here we need to provide the connection string 
So, let us create SAS configured Azure service bus namespace and a queue in it.
Go to portal
Search for Service Bus, provide the required details and click on Create.
Next, we’d create a queue. Inside Service Bus go to Queues and click on plus button create a Queue
Next inside the queue we need to go to Shared Access Policy settings and click on Add button to add a new SAS Key
Next click on connection strings, followed by Add button to add a new SAS Key.
This creates the key. Now copy the connection string.
Paste the connection string in the Plugin Registration tool
It will auto populate all the details. Now click on Save.
This adds a new service end point
Now register a new step – Entity – Lead and Message – Create.
Now to trigger it let us create a lead record in CRM.
A corresponding System Job will have the status.
Back in our queue we can see 1 new message added to it.
To read the message, let us create a simple windows application.
Install the WindowsAzure.ServiceBus package.
The source code for the queue. Here the connection string will be the same which we had specified in the plugin registration tool. The message body is of type RemoteExecutionContext.
The output.