Friday, 16 April 2021

Dynamics CRM Workflows VS Power Automate

Feature capability comparison

This table summarizes a comparison between Power Automate and classic workflows capabilities.

We are continuously adding new capabilities to Power Automate. We'll update information in this table as Power Automate gains capabilities; check back often! For information about upcoming capabilities that will help you replace classic background workflows with flows, see What's new and planned for Power Automate.


Microsoft Post: https://docs.microsoft.com/en-us/power-automate/replace-workflows-with-flows


CapabilityPower AutomateClassic Workflow
ModelingConditional branchingYesYes
LoopingYesNo
Wait conditions on fieldsNoYes
Parallel branchYesNo
Out-of-the-box connectors to external systems (trigger and perform actions in external services)YesNo
CompositionDynamic contentYesYes
Access to pre-image of event dataNoYes
Run child workflowsYesYes
Run Common Data Service actions (including custom)YesYes
Run custom background workflow activitiesNoYes
Group steps to run in a transactionYes (changesets)No
Approval workflowsYesNo
ExecutionTrigger on field changesYesYes
Trigger conditionally on field values (For example, on a certain date in a date field)NoNo
Trigger on multiple Common Data Service entity eventsYesYes
Run on-demandYesYes
Run-as scopes
(for example, organization, business unit, user)
YesYes
Run on a scheduleYesNo
Run synchronously (real-time)NoYes
HistoryAuditingYesYes
Run analyticsYesNo
Authoring and portabilitySolution supportYesYes
Modern designerYesNo
AI-assisted authoringYesNo

Wednesday, 18 November 2020

Show Lookup Dialog in Dynamics 365 v9.0


Introduction:

In Dynamics 365 v9.0 Microsoft introduces new development feature in Dynamics 365 to show lookup dialog using Xrm.Utility.lookupObjects method.

Xrm.Internal.Opendialog is most commonly used method to open dialog where we need to provide URL. But this method is not supported in UCI or mobile app.

So, open a lookup window using JavaScript can be achieved using Xrm.Utility.lookupObjects method.

Parameters for Xrm.Utility.lookupObjects method is as follows:

  • entityTypes: provide list of the entities to be displayed.
  • defaultEntityType: Specify the default entity to be shown in lookup window.
  • defaultViewId: Specify the Guid of default view need to be displayed in lookup dialog.
  • allowMultiSelect: Specify whether want to allow user to select multiple records.
  • viewIds: Provide the list of views that need to be available for lookup dialog.

Consider, an example where we need to open html webresource, on html page there will be a textbox and button to select the contact. When user click on “Select Contact” button, the lookup dialog of contact will gets open which allows user to select contact.

Steps need to follow:

1. We need to create html page with textbox and “Select Contact” button.

<!DOCTYPE html>

<html xmlns=”http://www.w3.org/1999/xhtml”>

<head>

<title></title>

<meta http-equiv=”X-UA-Compatible” content=”IE=11″ />

<style>

.bottomsection {

position: absolute;

float: right;

margin-top: 5%;

right: 10px;

bottom: 5px;

display: inline-block;

background-color: #F8F8F8;

border-top-color: #FFFFFF;

}

</style>

</head>

<body onload=”load();”>

<div style=”text-align:center”>

<h2>Contact Details</h2>

</div>

<div style=”height:50px”></div>

<div>

Please select Contact : <input type=”text” id=”TxtContact” /> <input type=”button” id=”btnContact” value=”Select Contact” />

</div>

<div>

<input type=”button” class=”bottomsection”  name=”Ok” value=”OK” />

</div>

<script src=”new_Jquery.js” type=”text/javascript”></script>

<script src=”ClientGlobalContext.js.aspx”></script>

<script src=”../../../../_static/_controls/lookup/lookup.js”></script>

<script src=”new_ShowContactLookup.js”></script>

<script type=”text/javascript”>

function load() {

this.OnContactSelectClicked();

}

</script>

</body>

</html>

2.  Next write a script for showing lookup dialog using Xrm.Utility.lookupObjects method.

function openWeb()

{

try {

var height = 360;

var width = 600;

//open the generate Work Order dialog

height = height != “undefined” ? height : null;

width = width != “undefined” ? width : null;

if (typeof Xrm != “undefined” && typeof Xrm.Navigation != “undefined” && Xrm.Navigation.openWebResource != “undefined”) {

var windowsOption = { height: height, width: width, openInNewWindow: true };

Xrm.Navigation.openWebResource(“new_ContactDetails.html”, windowsOption, null);

} else if (typeof Xrm != “undefined” && typeof Xrm.Utility != “undefined” && typeof Xrm.Utility.openWebResource != “undefined”) {

Xrm.Utility.openWebResource(“new_ContactDetails.html”, null, width, height);

} else {

return;

}

} catch (e) {

Xrm.Utility.alertDialog(e.message);

}

}

function OnContactSelectClicked()

{

try {

//bind click event of select contact lookup

$(“#btnContact”).click(function (e)

{

showContactLookupDialog();

});

} catch (e) {

Xrm.Utility.alertDialog(e.message);

}

}

function showContactLookupDialog() {

try {

var fetch = “<filter type=’and’><condition attribute=’lastname’ operator=’like’ value=’%a%’ /></filter>”;

var encodedURL = encodeURIComponent(fetch).replace(/’/g, “%22”);

var lookupParameters = {};

//specify the list of entity types to be displayed in lookup dialog

lookupParameters.entityTypes = [“contact”];

//Sepecify the default entityType need to be displayed

lookupParameters.defaultEntityType = “contact”;

//Default view need to be displayed

lookupParameters.defaultViewId = “{00000000-0000-0000-00AA-000010001004}”;

//allow multiple selection or not

lookupParameters.allowMultiSelect = false;

//list multiple views available on lookup dialog

// lookupParameters.viewIds = [“{0D5D377B-5E7C-47B5-BAB1-A5CB8B4AC105}”, “{A2D479C5-53E3-4C69-ADDD-802327E67A0D}”];

lookupParameters.customFilters = [encodedURL];

lookupParameters.customFilterTypes = [“contact”];

Xrm.Utility.lookupObjects(lookupParameters).then(DisplaySelectedContact, null);

} catch (e) {

Xrm.Utility.alertDialog(e.message);

}

}

function DisplaySelectedContact(selectedContact) {

try {

if (selectedContact != undefined &&  selectedContact != null && selectedContact != “”)

$(“#TxtContact”).val(selectedContact[0].name);

} catch (e) {

Xrm.Utility.alertDialog(e.message);

}

}

3. Add ribbon button “Contact Details” on Account form. Add “openWeb” function onclick of the ribbon button.

Show Lookup Dialog

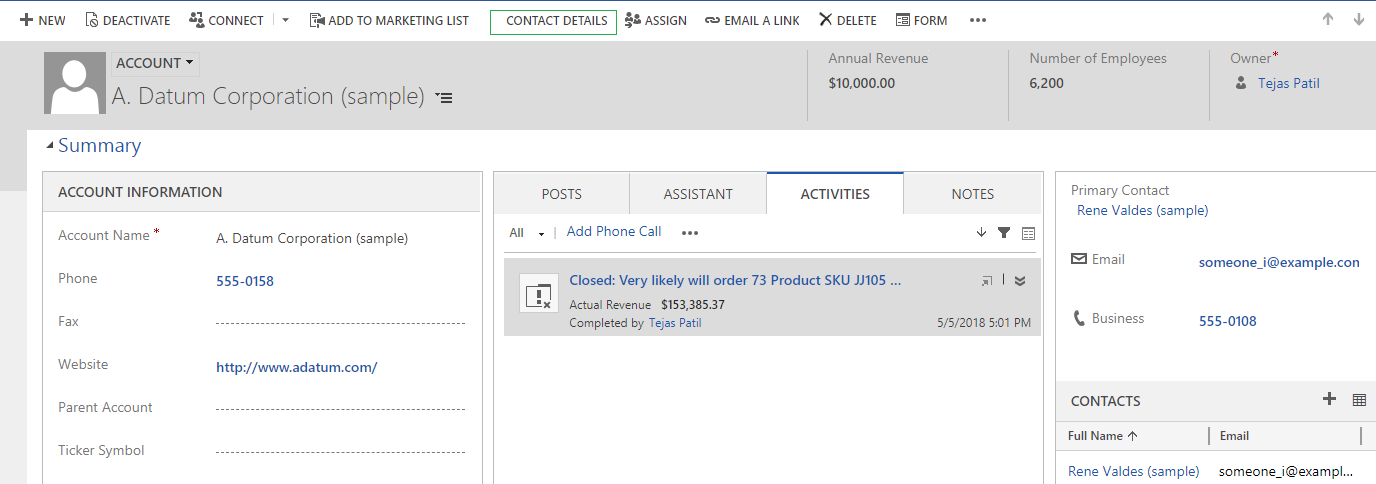
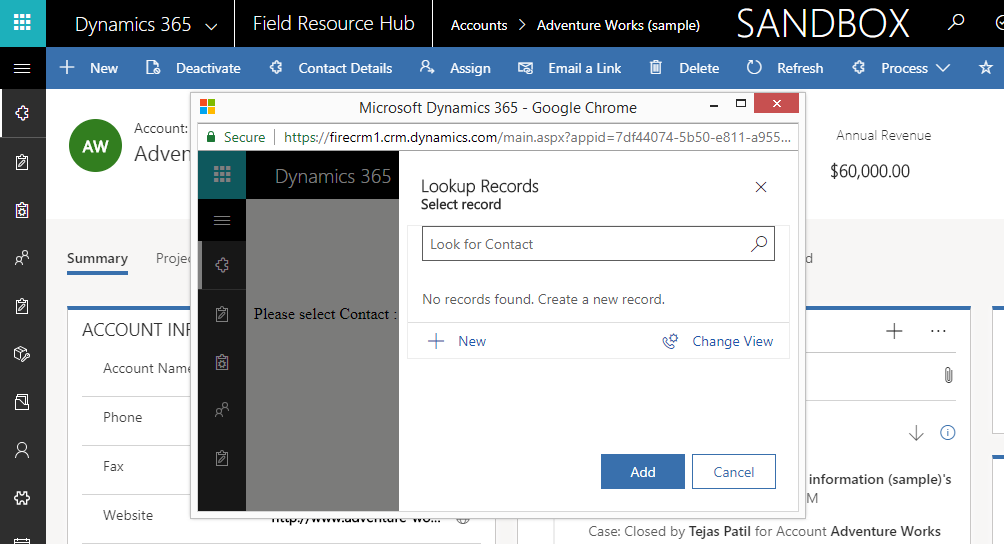
4. Now when we click on the contact lookup button it will open the “Contact Details” html page.

Show Lookup Dialog

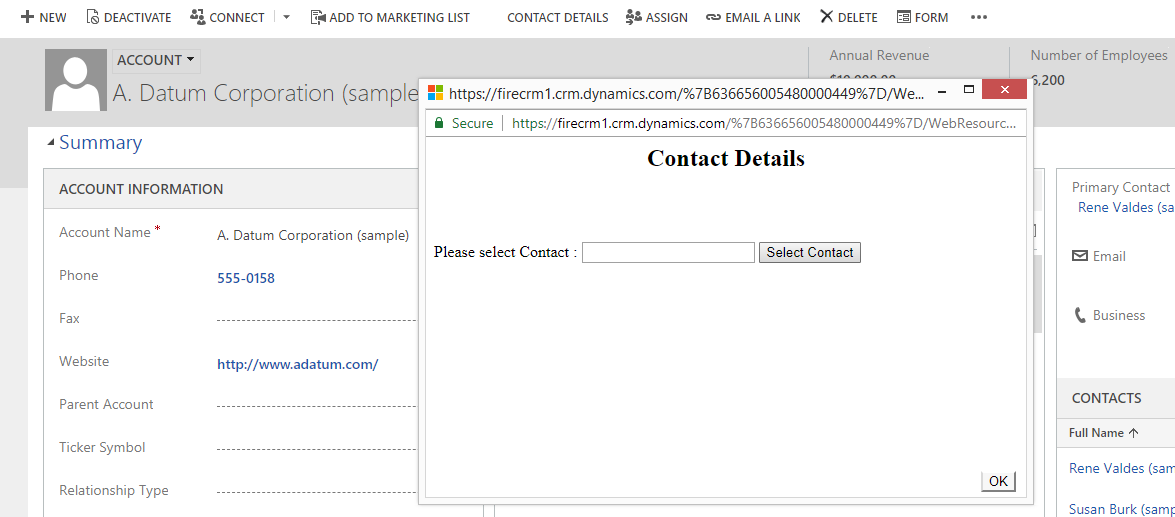
5. This html page consist of a textbox and “Select Contact” button. When user click on the button, lookup dialog with default entity and default view provided in parameters of lookupObjects method gets open.

Show Lookup Dialog

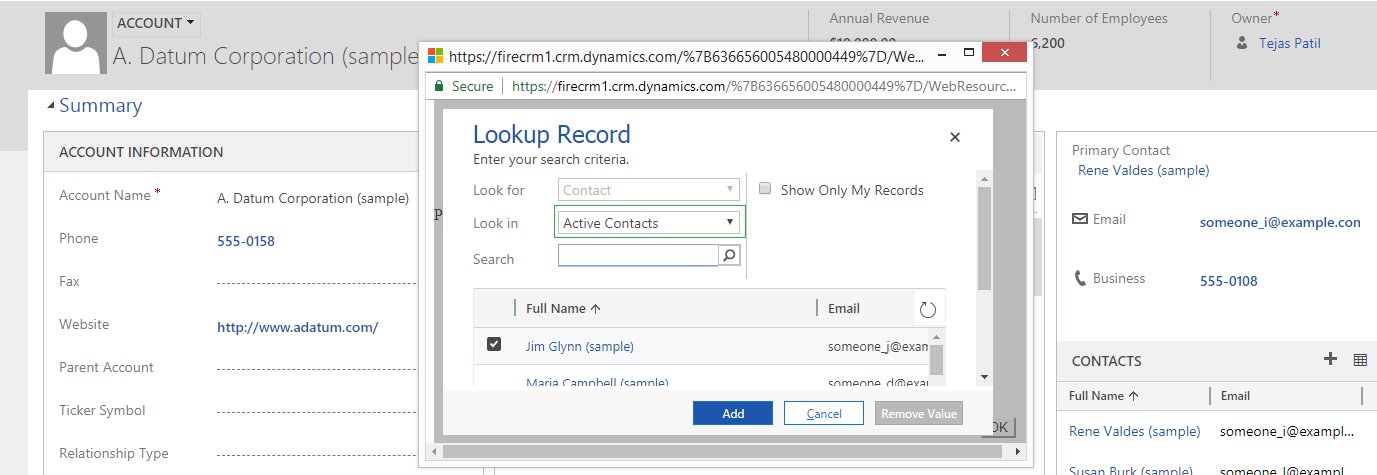
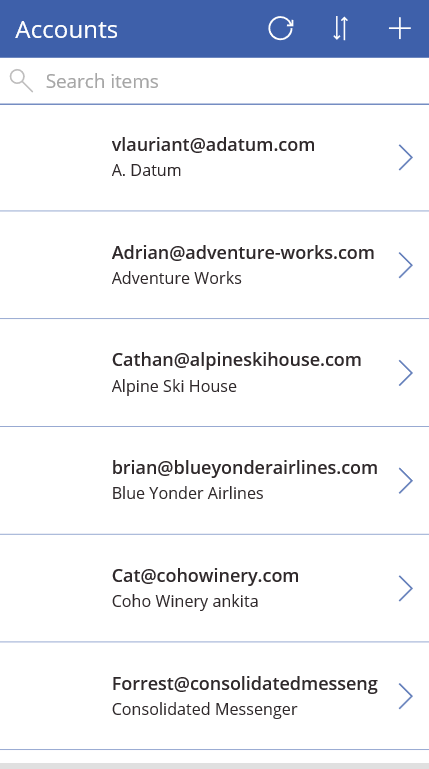
6. In UCI or Mobile app it opens the lookup dialog as shown in below screenshot.

Show Lookup Dialog


Working on Lookup Field of Dynamics 365 in PowerApps


Introduction:

PowerApps is a quick service that helps you to easily build business apps that runs on browsers and in phone or tablet without any coding experience needed. It allows anyone in an organization unlock new business agility.

Recently we had a business requirement, where we need to work on lookup field of Dynamics 365 using PowerApps, but currently, we cannot directly fetch the lookup values in PowerApps. So after some research and play around we found a solution on this.

This blog explains about steps to read and set Lookup fields of Dynamics 365 in Power Apps.

1. Create a new power Apps by selecting the Phone Layout as shown in the below screenshot.

Working on Lookup Field of Dynamics 365 in PowerApps

2. Select the database i.e. Entity and then click on Connect as shown in the below screenshot.

Working on Lookup Field of Dynamics 365 in PowerApps

3. We get the following three screen on the left side

  • Browse Screen
  • Detail Screen
  • Edit Screen

4. Click on Browse Screen and user can see the List of Opportunities in the CRM.

5. Now as seen in the below screenshot user can see GUID of parent account.

Working on Lookup Field of Dynamics 365 in PowerApps

To display the name of the parent account follow the steps as given below:

  • Add a data source of Account i.e. Account Entity by selecting on View, Data source and then select “Add Data Source” as shown in the below screenshot.

Working on Lookup Field of Dynamics 365 in PowerApps

To display the name of the parent account set the text property of the Body1 which contains parentaccountid as below:

LookUp(Accounts,accountid=ThisItem._parentaccountid_value,name)

The Lookup Property search the accountid in Accounts which equals to GUID shown in textbox and returns the name of the Account.

Working on Lookup Field of Dynamics 365 in PowerApps

Now you can see the name of the parent Account which is selected on Opportunity as shown below.

Working on Lookup Field of Dynamics 365 in PowerApps

Following are the steps to assign Lookup value in PowerApps:

1. Click on Edit Screen and insert the “Search” Icon inside a Data Card as shown in the below screenshot.

Working on Lookup Field of Dynamics 365 in PowerApps

2. Insert another List screen and add data source as Accounts. This screen will show list of Accounts present in CRM.

Working on Lookup Field of Dynamics 365 in PowerApps


3. On “OnSelect” property of Search Icon set the formula as:

Navigate(AccountScreen,ScreenTransition.Fade,{searchAccountName : DataCardValue12 .Text});Clear(accountToBeAdded)

Working on Lookup Field of Dynamics 365 in PowerApps

The above formula will navigate the Account Screen which shows list of Accounts and update the value of searchAccountName by value in DataCardValue12

4. Now on Account Screen, on “OnSelect” property of  icon write the formula as

ClearCollect(accountTobeAdded , {account :BrowseGallery2.Selected});Back()

Working on Lookup Field of Dynamics 365 in PowerApps

This formula create a collection name as “accountToBeAdded” and add the selected account in Collection and navigate back to the Edit Screen.

5. Now go back to the edit form, on text box of the Account  set the Default property  as following:

If(IsBlank(First(accountToBeAdded).account.accountid),Blank(),First(accountToBeAdded).account.name)

Working on Lookup Field of Dynamics 365 in PowerApps

This formula check whether the “accountToBeAdded” collection contain accountid. If true set the name else set it as “Blank”.

6. On Update property of Data Card set the formula as:

First(accountToBeAdded).account.accountid

Working on Lookup Field of Dynamics 365 in PowerApps

The above formula will update the Data card value to the selected account.