Introduction:
PowerApps is a quick service that helps you to easily build business apps that runs on browsers and in phone or tablet without any coding experience needed. It allows anyone in an organization unlock new business agility.
Recently we had a business requirement, where we need to work on lookup field of Dynamics 365 using PowerApps, but currently, we cannot directly fetch the lookup values in PowerApps. So after some research and play around we found a solution on this.
This blog explains about steps to read and set Lookup fields of Dynamics 365 in Power Apps.
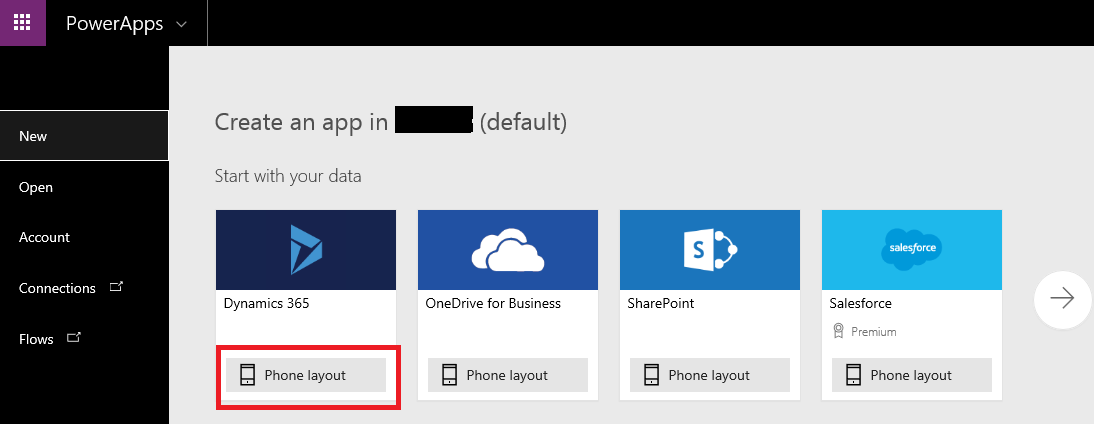
1. Create a new power Apps by selecting the Phone Layout as shown in the below screenshot.
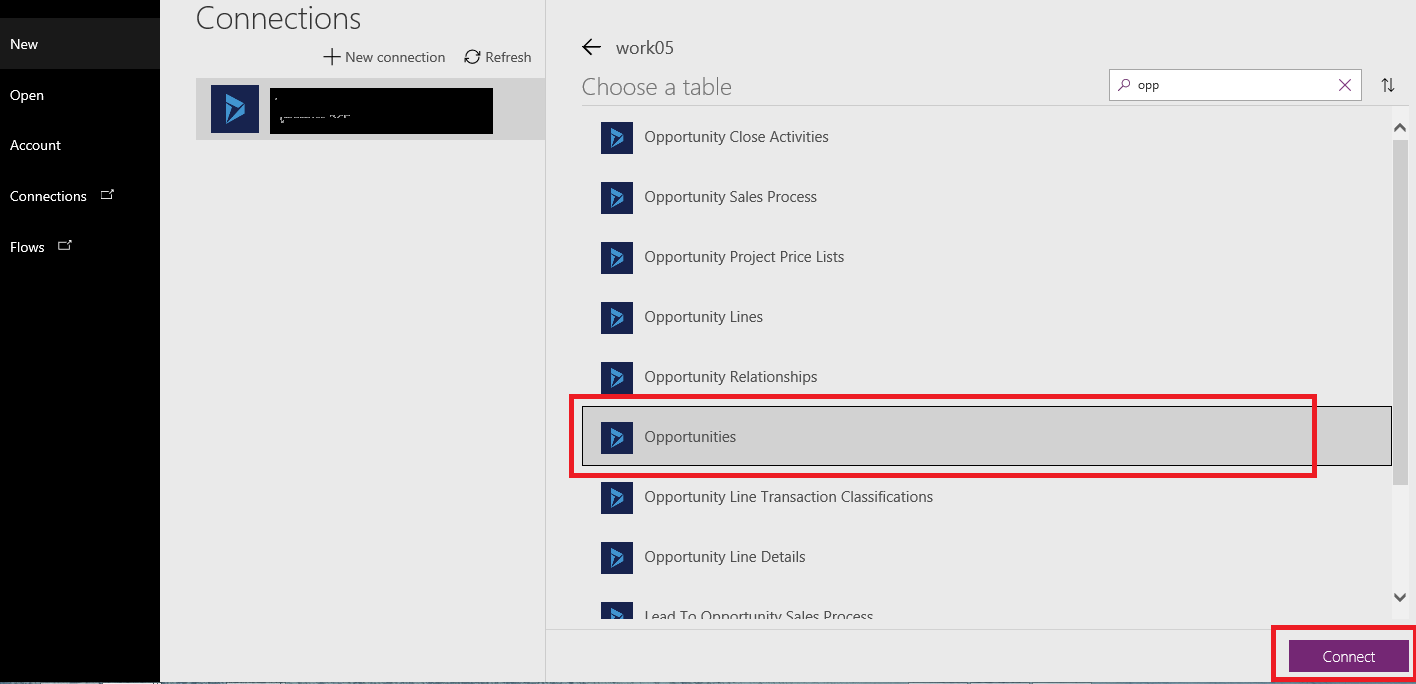
2. Select the database i.e. Entity and then click on Connect as shown in the below screenshot.
3. We get the following three screen on the left side
- Browse Screen
- Detail Screen
- Edit Screen
4. Click on Browse Screen and user can see the List of Opportunities in the CRM.
5. Now as seen in the below screenshot user can see GUID of parent account.
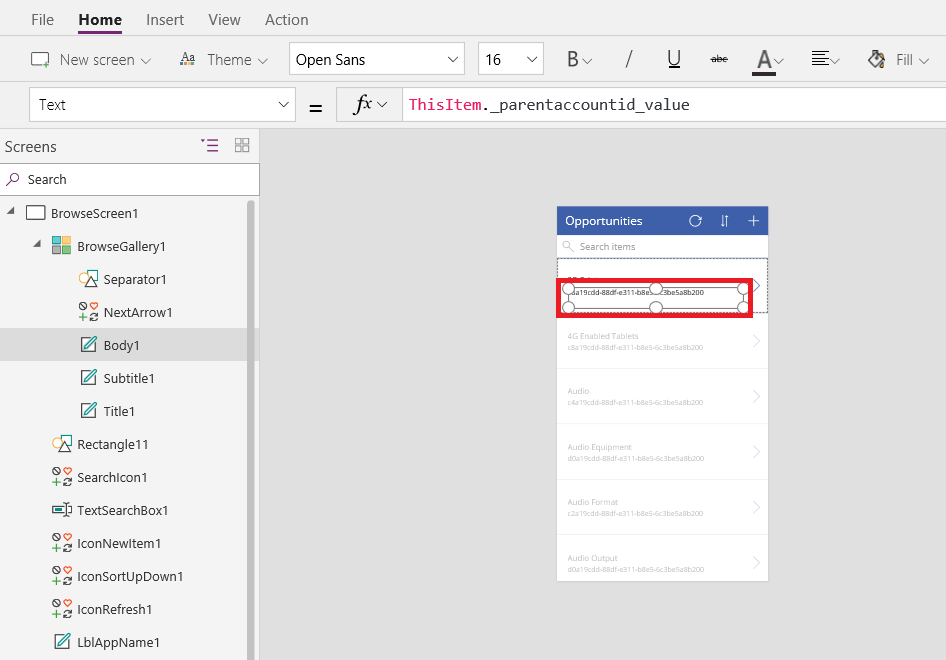
To display the name of the parent account follow the steps as given below:
- Add a data source of Account i.e. Account Entity by selecting on View, Data source and then select “Add Data Source” as shown in the below screenshot.
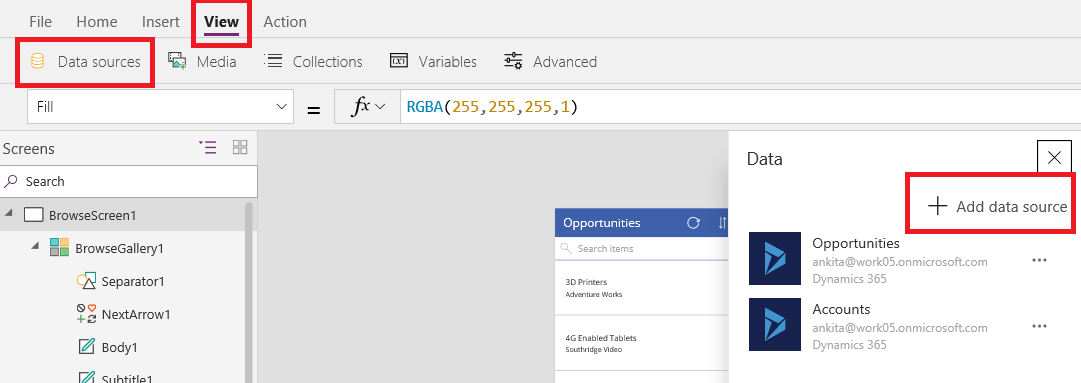
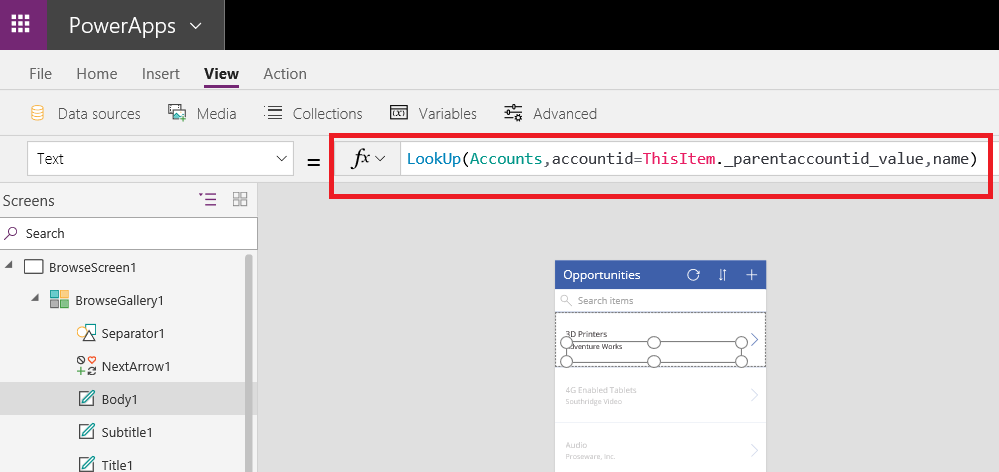
To display the name of the parent account set the text property of the Body1 which contains parentaccountid as below:
LookUp(Accounts,accountid=ThisItem._parentaccountid_value,name)
The Lookup Property search the accountid in Accounts which equals to GUID shown in textbox and returns the name of the Account.
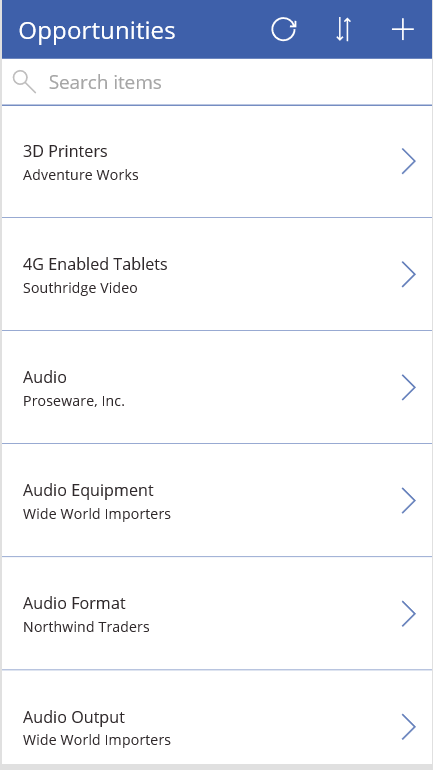
Now you can see the name of the parent Account which is selected on Opportunity as shown below.
Following are the steps to assign Lookup value in PowerApps:
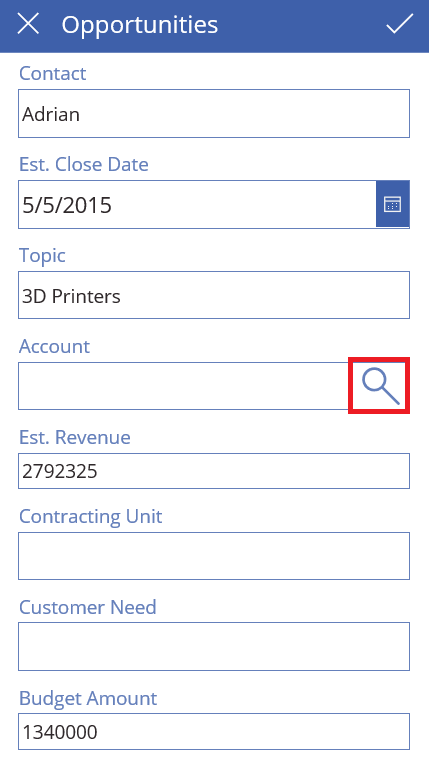
1. Click on Edit Screen and insert the “Search” Icon inside a Data Card as shown in the below screenshot.
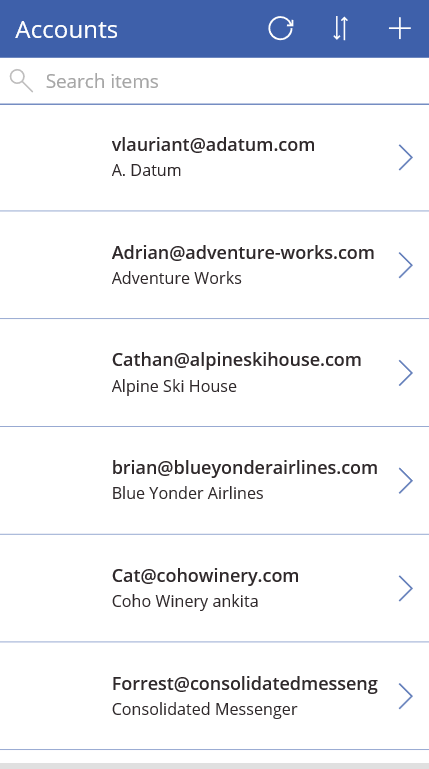
2. Insert another List screen and add data source as Accounts. This screen will show list of Accounts present in CRM.
3. On “OnSelect” property of Search Icon set the formula as:
Navigate(AccountScreen,ScreenTransition.Fade,{searchAccountName : DataCardValue12 .Text});Clear(accountToBeAdded)
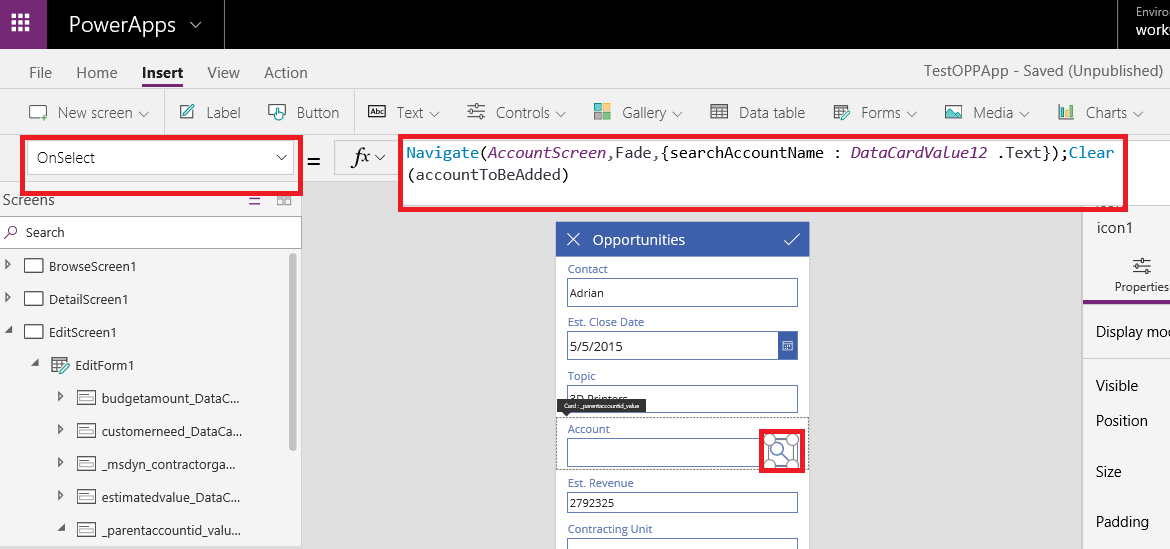
The above formula will navigate the Account Screen which shows list of Accounts and update the value of searchAccountName by value in DataCardValue12
4. Now on Account Screen, on “OnSelect” property of icon write the formula as
ClearCollect(accountTobeAdded , {account :BrowseGallery2.Selected});Back()
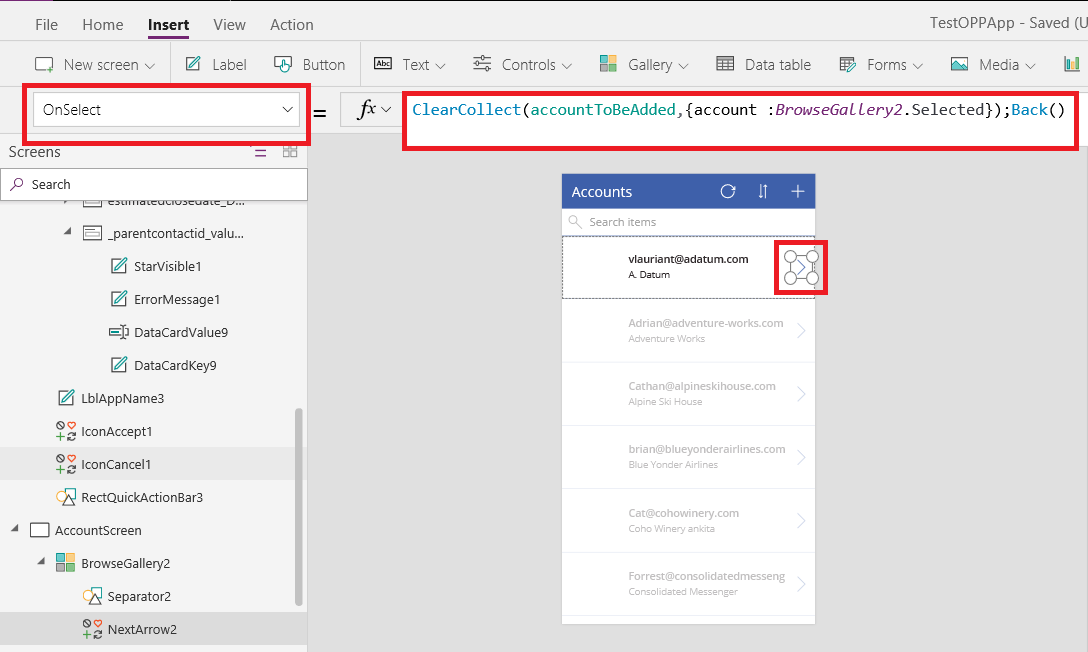
This formula create a collection name as “accountToBeAdded” and add the selected account in Collection and navigate back to the Edit Screen.
5. Now go back to the edit form, on text box of the Account set the Default property as following:
If(IsBlank(First(accountToBeAdded).account.accountid),Blank(),First(accountToBeAdded).account.name)
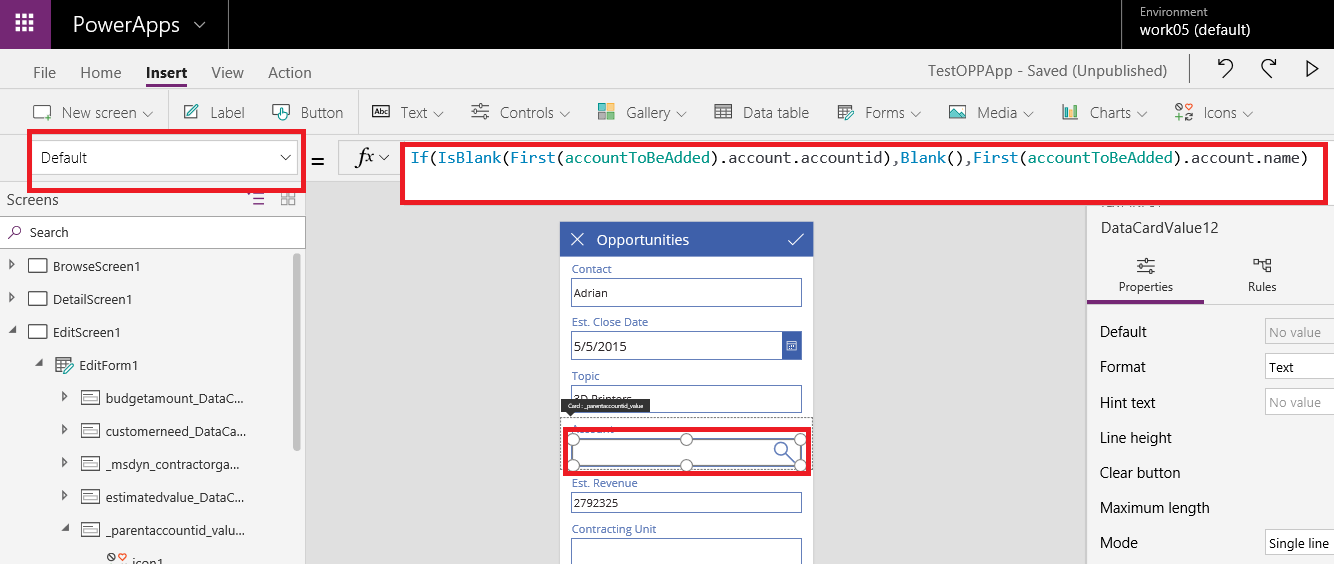
This formula check whether the “accountToBeAdded” collection contain accountid. If true set the name else set it as “Blank”.
6. On Update property of Data Card set the formula as:
First(accountToBeAdded).account.accountid
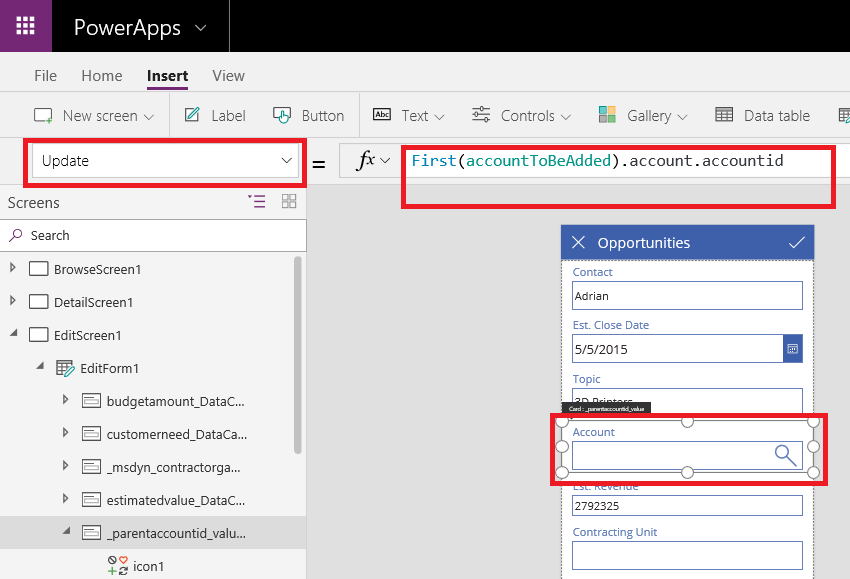
The above formula will update the Data card value to the selected account.
No comments:
Post a Comment