Develop an image gallery utility to see all the images attached to notes. Here is the complete code for this utility:
<!--This is a Image Gallery utility, which can be used with any entity which haverelationship with Notes, this web resource will show all the images attached to notes --> < html > < head > < style type = "text/css" > .left - div { display: inline - block; cursor: pointer; } .right - div { cursor: pointer; display: inline - block; } < /style> < meta charset = "utf-8" > < /head><body style="-ms-zoom: 1;"> < script src = "../../ClientGlobalContext.js.aspx" > < /script> < script src = "../Script/SDK.REST.js" type = "text/javascript" > < /script> < script type = "text/javascript" >//variablesvar currentImage = 0;var img = document.createElement("IMG");var images = new Array;var TotalImages = 0;var SectionName;var TabName;document.onreadystatechange = function() { if (document.readyState == "complete") { //get query parameters var queryParam = GetGlobalContext().getQueryStringParameters().data; var fields = queryParam.split(","); TabName = fields[0]; SectionName = fields[1]; //hide control in case form create if (isformtypeCreate()) showImageGalery(TabName, SectionName, false) else { showImageGalery(TabName, SectionName, true) getnotesImages(); } } } //check for form create modefunction isformtypeCreate() { if (window.parent.Xrm.Page.ui.getFormType() == 1) //create mode return true; else return false;}//hide/show image galleryfunction showImageGalery(tabname, sectionname, flag) { window.parent.Xrm.Page.ui.tabs.get(tabname).sections.get(sectionname).setVisible(flag);}//get images from notesfunction getnotesImages() { var regardingObjectId = window.parent.Xrm.Page.data.entity.getId(); var entitySchemaName = "Annotation"; var odataQuery = "?$select=AnnotationId,DocumentBody,MimeType&" + "$filter=ObjectId/Id eq guid'" + regardingObjectId + "' and IsDocument eq true and startswith(MimeType,'image/') "; if (typeof(SDK) != "undefined") { SDK.REST.retrieveMultipleRecords(entitySchemaName, odataQuery, getnotesImagesCallback, function(error) { alert(error.message); }, function() {}); } else { alert("REST.SDK library is not available"); }}//callback methodfunction getnotesImagesCallback(resultSet) { if (resultSet.length > 0) { TotalImages = resultSet.length; for (i = 0; i < resultSet.length; i++) { var mimeType = resultSet[i].MimeType; var body = resultSet[i].DocumentBody; images[i] = "data:" + mimeType + ";base64," + body; } changeImage(0); } else showImageGalery(TabName, SectionName, false);}//change imagefunction changeImage(counter) { currentImage += counter; if (currentImage != TotalImages) { if (currentImage < 0) currentImage = 0; } else { currentImage = 0; } img.src = images[currentImage]; document.getElementById('imageGallery').appendChild(img);}< /script> < div >< input onclick = "getnotesImages()"alt = "Reload"type = "image"src = "../Image/Refresh.png" > < input class = "left-div"alt = "Go Next"onclick = "changeImage(-1);"type = "image"src = "../Image/Back.png" > < input class = "right-div"alt = "Go Back"onclick = "changeImage(1);"type = "image"src = "../Image/Next.png" > < /div> < div id = "imageGallery"style = "width: 100%; overflow: hidden;" > < /div></body > < /html>
1. Import this solution to your CRM environment (We can place this web resource to any entity which has relationship with notes)
2. Let’s add this to account form, Open account entity form editor, and add a new section to existing tab or add a new tab and section to form.
3. Double click on tab and make note of tab name, follow similar steps for section and make note of section name, we need to pass these to web resource.
4. Select your section and click on Web Resource by navigating to insert tab under ribbon bar.
5. Select web resource properties like following:

6. Click on OK and save, publish your changes.
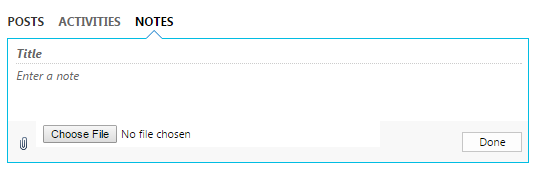
7. Open any account record and attach image using notes.
No comments:
Post a Comment